Wednesday, June 29, 2022

Ways To Lighten Your Makeup Bag When Traveling.


This summer, more people are out traveling and many flights are totally full.  There is little overhead space available by the time the last people board and if you are going off to somewhere new or unique, you might want to use makeup that can be used in more than one way because you want to keep the weight down and leave space for all the things you buy on the trip.

One way to cut down on the number of things you take is to find items that will do double duty.  As for cleaning your face, find a foaming oil so you don't need to take both the oil and the foaming cleaner.  If you aren't into cleaning your face with oil and a foaming cleanser, look for a wipe that will both clean and exfoliate your face.  These wipes or towelettes are great for cleaning and exfoliating and some will also brighten your skin at the same time so read packs carefully.

Instead of adding a blush, bronzer, and highlighter to your makeup bag, find a palette that combines all three into one container so you have everything you need to contour and highlight at the same time. There are also small boxes with powders designed to fill in your brows and wax to make eye brows perfect.  In addition, look for a stick that has both eye liner and shadow.  A good one will allow you to make either thin or thick lines along the lashes while the shadow end will easily apply shadow without needing a brush.  

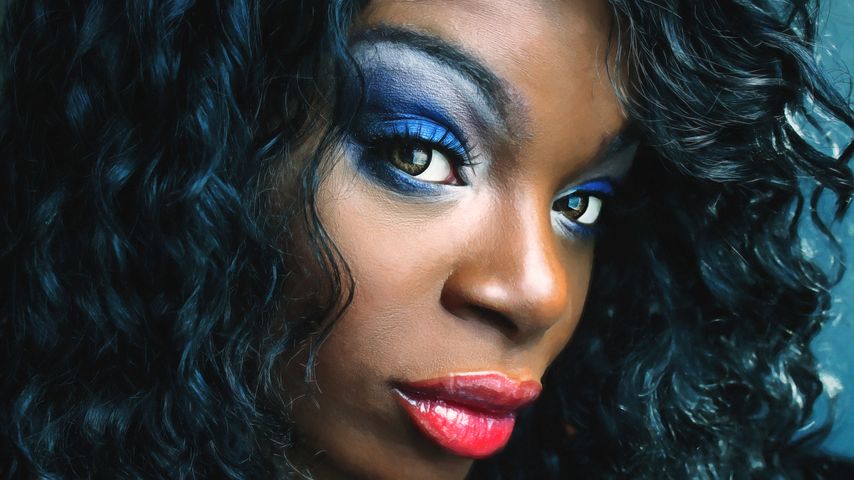
If you can't find one of those, eyeliner pencils can be used to create the line and then applied on the eyelid and smudged to get an eyeshadow look but a creamier eyeliner is better for this.  Pack a few different shades to mix and match liners and shadows.  To fully finish off the look, get your hands on a two step mascara that has primer on one side and mascara on the other side. 

 It is also possible to use a nice creme blush both on your cheeks and to add a bit of color to your lips. Furthermore, there are lip liners out there that will allow you to line the lip while filling it in so it looks like you are wearing lipstick. Want your nails to match your lips?  Go for the strips of nail polish stickers so all you have to do is apply them.  The stickers can be used for the full nail or just the tips for a French manicure style. You don't need to take bottles which can break or spill. In addition, they are extremely light and don't take up much weight or space.

Check out a BB cream because it can replace your foundation, sunscreen, and a moisturizer inside your makeup bag.  Using a BB cream means one tube or bottle instead of three so fewer bottles means less weight.  I am picky about my sunscreen and prefer to take a small bottle of my preferred brand but I like a nice tinted moisturizer so I get the hydrating power of moisturizer with a bit of color.

Although you can use certain types of makeup in other ways it is not always the best suggestion.  Makeup such as lip liner can be used to fill in the eyebrow while concealer can be used as an eyeshadow primer or to contour.  Eyeshadow can be used on the lips or as a highlighter.  Lipstick can double up as blush, to correct color, and if it is in liquid form, it can double as eyeliner.

I prefer the products meant to be used as intended but I also need to know where to find all of the alternatives so I can reduce the number of things I carry with me when I travel.  Let me know what you think, I'd love to hear.


Monday, June 27, 2022

Staying Hydrated With Fruit Flavored Water.

We always hear that we need to stay hydrated.  In the summer, it can take more to stay hydrated than at other times of the year but it is possible to become dehydrated in the winter.  Years ago, I used to work at a Ren Faire in Texas.  We were told to drink lots of fluids even if you don't feel thirsty because by the time you feel thirsty, you are already dehydrated.  The one thing we'd do to monitor our intake was to check the color of our pee when we went to the bathroom.  If it was a dark yellow, you knew you needed to drink more water. 

The best liquid to prevent dehydration is plain old water but I am one of those people who never learned to like water.  It maybe because I've lived places where the water foamed, tasted weird, or just didn't look right. Yes, I could buy water from the store but I haven't always had the money to do that so I learned to take regular water and flavor it. I began with using bottle lemon or lime juice because I had that in my fridge. I'd add just a little juice to flavor it but not to the point of having to add sugar.

Later on, I learned about fruit infused water, where you place fruit into water to give it a bit of flavor but not enough to change the lack of flavor into a light hint of flavor. Many people need some sort of flavor associated with water.  Today, we'll look at how to make your own flavored waters and suggestions for flavors.

Once you've added the fruit, the flavors will begin to develop and you'll notice a light hint within 15 minutes for a light flavor but you get a stronger flavor after 30 to 60 minutes.  Depending on how strong you like your flavored water, you'll be able to use your fruits again up to four times. You can make a batch in the morning, then as you drink the liquid, refill it, and repeat throughout the day. Every time you reuse the fruit, the flavor becomes weaker and when the fruit has no more flavor, compost them.

The flavored water is best consumed on the day that it is made. If you use citrus with the rind to flavor the water, don't let it set longer than four hours or the liquid could become bitter.  It is important to keep the flavors nice so you'll drink the water and stay hydrated all day. In addition, you can use either plain or sparkling water so you can alternate the type of water if you want.

Rather than throwing fruit into a huge gallon or two of water, consider using a quart jar to make the fruit infused water in so the flavor spreads through it faster and is ready to drink quickly.  If you want, make one and when you begin to drink that, start a second jar so you have it ready as soon as you need it. Now for the suggestions of combinations.  Sparkling water can be used rather than plane water or you can alternate waters.

1.  Take, ice, 1/4 red or pink grapefruit cut into slices, a sprig of rosemary, and enough water to fill the jar to the top.   If you don't like ice, leave that out but put the grapefruit, rosemary, and ice into the container before filling with water.  Let set for between 15 minutes and an hour.  Refill when done.  When there is no flavor left, throw out the fruit and rosemary.

2. Take ice, 1/2 a lemon sliced into thin rounds, 1/2 a lime sliced into thin rounds, place into a container before covering with either plane or sparkling water. Let set between 15 and 60 minutes.  Make refills as needed.

3. Take ice, 1 peeled kiwi cut into thin slices, 2 strawberries hauled and sliced into thin rounds, 1/2 lime cut into slices placed in a container, and cover with water. 

4. Take ice, 1/4 of a cucumber cut into thin slices, 1/4 cup fresh mint leaves and place in a container.  Finish by filling with water and letting set 15 to 60 minutes before drinking.

5. Take ice, 3 to 4 half slices of watermelon that are further cut into smaller triangular slices, 1/4 cup of basil and place into the container.  Top with water and set 15 to 60 minutes before drinking.  Make refills as needed.

6. Take ice, 1/4 cup fresh raspberries, 1/4 cup mint leaves, and fill with plain or sparkling water,  and let set for 15 to 60 minutes. Make refills as needed. 

7. Take ice, 1/3 cup sliced pineapple, 1/4 cup fresh coconut separated from the shell, before covering with water and let set 15 to 60 minutes before drinking. 

8. Take ice, 1/4 cup blueberries, 1/2 orange sliced into thin slices, and fill with water before letting it set between 15 and 60 minutes.

9. Take ice, 1/2 cup strawberries thinly sliced, 5 basil leaves that have been torn to release flavor, and 1/2 thinly sliced lemon.  Fill with water and let set 15 to 60 minutes before drinking.

10. take ice, 1/2 cup of cubed honeydew melon, 1/2 cucumber thinly sliced, and 5 mint leaves torn in the container.  Fill with water and set between 15 and 60 minutes.

11. Take ice, 1 cup blackberries, 1/2 orange thinly sliced, and a 1 inch chunk of ginger that is thinly sliced.  Fill with water and set between 15 to 60 minutes.

12. Take ice, 1/2 mango cut into small cubes, 1/2 cup raspberries, and a one inch piece of ginger cut into thin slices.  Fill with water and let rest for 15 to 60 minutes.

These are just a few recipes to get you started.  You can mix whatever fruits you want to use or you can do a quick search for more suggested mixtures.  Let me know what you think, I'd love to hear.  Have a great day.


Saturday, June 25, 2022

Friday, June 24, 2022

Wearing Bold Makeup During The Day

Summer is a good season to break out the bright and bold makeup since the days are long and the world tends to be much brighter than in any other season. Move away from the neutral and browns into the world of blue, green, pink, and purple. Although one wants bold, it is possible to over do it.  Today, I'm looking at wearing a bold look during the day since most times, we associated bold with evenings.

When going with the bolder, brighter, or darker look, you will "break" some of the normally accepted "rules".  For instance, the bolder the makeup you choose to wear, the foundation you choose should be one to two shades darker than your normal shade to counter the brightness.  One of the best ways to get your foundation on for this look is to make sure you have extremely bright lighting.

Select the one feature you want to brighten such as your lips or your eyes but only one, otherwise you can look overdone or not real.  In addition, you look more appropriate for daytime.  Now, if you aren't ready to commit fully, you can use pops of color to emphasis the look such as using a colored eyeliner rather than bright eyeshadow.  Applying pops of color is great for summer when you might choose to wear less makeup. 

When you use bold eye shadows on your eyes, there are a few things you can do to have it turn out better. First choose the colors you want to use.  Use one color if you want a stark bold look, otherwise select two or more colors so you have one prime color and a transitional color such as a deep purple with a light purple or pink. In addition, decide on the type of eyeshadow you want.  Powder or cream?  

Begin by applying a primer to your eyelid so the shadow stays and doesn't smudge or accumulate in the creases.  If you are using more than one shadow, apply the transitional color or the lighter color first and apply it all over your eyelid, into the crease and a bit further. When you apply the second darker color, begin applying it in the middle and gradually going lighter to the edges.  Soften the edges of the bold at the top out by using a bit of the lighter or transitional color blended into it. Once the eyeshadow is on, add the eye liner, mascara or fake lashes

Make sure to use highlights down the top of the bridge of your nose, along the top of the cheeks, the inner corner of you eye, on the chin, and at the bow of the lips.  Make sure it is blended in to keep the look light and adds dimension.  

This is one of the cases you want to use lip liner first if you plan to highlight your lips, then apply the lip stick. When applying either, use a good light so you can see the edges.  If you mess up, it can be cleaned up with concealer and a cotton swab.   To apply the lipstick for the best results, begin by cleaning, exfoliating, and moisturizing the lips. Next cover all the lips with concealer that is similar to the color of your lips which is like priming your lips. Now you are ready to apply the lip liner in a shade that is close to the color of your lipstick around your lips.  Use the side of the pencil to fill in the edges before applying the lipstick itself.  Be sure to apply it over the liner to add a dimension.

The great thing about getting a bold look is that you can always remove it and try again if it doesn't work out quite right.  Let me know what you think, I'd love to hear.  I hope you have a great day.


Wednesday, June 22, 2022

What Type Of Makeup Should You Wear In Super Hot Weather.


Wearing makeup in extremely hot weather can be difficult due to the propensity of the human body to sweat and we do more of it when the temperature is up. This means you need to look at the type of makeup you use so it stays on nicely. Although it is often better to go without makeup, there are times such as an evening out when we want to wear it.

The most important step in the process is to begin by prepping your skin.  Always cleanse your skin so you get rid of dirt, sweat, and other things that could effect your makeup.  Then apply an oil free broad spectrum sunscreen on the clean skin so you have enough protection.

Think about starting with a primer when you begin your makeup.  Primer was originally designed to wear in humid weather to extend the life of the foundation. However, it should be only used on the T-zone, the side of the nose and cheeks but if you use too much primer, you skin suddenly looks too dull or flat.  Furthermore, avoid a silicon based primer because it can dry out the skin.  Instead of messing with a primer, think about using a good hydrating lotion.

As far as foundations go, look for a liquid rather than a cream because creams are less stable than liquid foundations. In fact, you'll want to look for a water based formula because the rich hydrating foundations tends to slide off in the hot weather. When you apply the foundation, apply it in a light layer and add another layers in areas that might need a little extra but do not use a heavy layer.  Finish with a nice powder in the T-Zone and it should last all day but make sure the foundation is completely dry before applying the powder, otherwise it looks caked.  Should you decide to go with a cream blush, look for one that has a dry finish otherwise they'll turn greasy.  Although shimmer blushes may look cool, they can make your skin look oilier in the heat.  

If you need to conceal any blemishes, look for a concealer that is tacky rather than creamy since it will stay on your face better.  In addition, do not try to powder away any shine you see as it will only make the face look caked and horrid.  Instead, make sure you have blotter paper so you can blot the shine away just like they did in my grandmothers time. Blotting papers remove the shine without disturbing your makeup.  For best results, wrap a piece of blotting paper around a dry powder puff for more control.

If you want to wear eye shadow and liner so it lasts longer there are two different methods you can use.  One is to apply an eyeshadow primer under it all or apply a layer of cream eyeshadow with a layer of powdered eyeshadow on top. To finish the look, apply a sheer or tinted lipstick while avoiding anything too glossy or shiny. Now if you want to ensure your makeup stays in place, finish the whole look off with a makeup setting spray but be careful.  These types of spray keep your makeup on for up to 16 hours so it takes a bit of elbow grease to get your makeup off at night.

So now you know how to wear makeup in extreme heat.  Remember, you can wear a lighter look with just a bit of tinted foundation, sunscreen, eyes, and a bit of color on the lips but no matter what, begin with a freshly cleaned face.  Let me know what you think, I'd love to hear.  Have a great day.


Monday, June 20, 2022

Working Out Using DVD's

When the pandemic hit, gyms closed down so people had to find other ways to work out.  For me, it didn't make a big difference because I'm usually in the middle of nowhere so there is no gym or center available to take classes.  I've had to rely on the use of DVD's for the past 20 years or so.  I'll admit, I have several DVD's that are a bit tougher than I can handle because they have you popping down on your hands and knees, then up, and back down.  My knees don't like those or the DVD's with modification that aren't that much different from the regular.  I'll share what I've learned plus some things to look for when getting a DVD.

Personally, I like DVD's that have women who are different weights and shapes because not all of us, myself included, are athletically slender with no belly or fat.  When I see women who have real curves or are older say over 40, I feel as if I'm working out with others who might be my neighbor. When every person on the video has no fat, lots of abs and muscles, my insecurities explode and I'm always comparing my body to theirs and I lose every time.  

Another thing I love to see in any workout are modifications.  My favorites always seem to have the instructor showing the regular workout with someone showing the routine with modifications for people who might have joint issues or are beginners and someone who shows the more advanced moves so I can chose which one is best for me.  In fact, it is recommended that one check the level of fitness the DVD is rated, does it have modifications so you can progress from say beginner to intermediate.  I will admit, when a store went out of business, I bought a kettlebell with 6 different DVD's and it turns out the workouts are designed for folks who have been doing kettlebells for years.  I bought some other kettlebell DVD's with beginner and intermediate workouts so I can get myself to the point I can do the more advanced workouts.

Next, read the description to see if it tells you how much space you need and what equipment is needed or if the equipment is included.  Do you need a resistance band, weights, a mat, or blocks.  Is the DVD asking for equipment that is expensive or only used with the DVD?  Then you might want to look for something else.  I have some DVD's that use weights and the modified workout either uses a set of cans instead of one pound weights or no weights.  I have a couple other DVD's that included the resistance band so I didn't have to try to order the equipment.

What are you looking for?  Are you looking for a workout that tones your whole body, helps build muscle, builds abs, improves your booty?  Make sure the DVD meets your criteria and set some realistic goals and expectations before you go shopping. In addition, think about what types of things you like, do you like to dance, move about, do lots of weights because you'll want to find DVD's that meet that desire.  I love to dance, so I have lots of dance type workouts but I also have DVD's that have me moving around a lot.  Some of my DVD's include resistance bands or weights while I move about.

One other thing to think about is are you the type of person who likes a definite routine and you'll be happy with just a few DVD's or do you need a large number of DVD's to keep from getting bored?  I have quite a few because I like to focus on different aspects of the body depending on the day.  I also include things like tai chi, yoga, and DVD's focused on improving balance.

Take time to look at the instructor.  Look for them on the internet to see what their qualifications are and see if they have something on Youtube so you can see them in action.  Do you like their style?  I generally read the reviews to see what people say and how the ratings are spread.  If you have a library near by, see if they have the DVD you want in their video section so that you can check it out.  In general, if I like one video by an instructor, I'll order more of their stuff because I know I like them.

Finally, ask yourself how often do you think you'll use the DVD based on the type of workout and the length of workout.  I have workouts of different lengths because somedays I need a 10 minute workout to get me started and other days, I have time for a 50 minute workout.  Do not buy something that is 75 minutes long when you know you don't usually have more than 20 minutes available most day. 

You may be a person who prefers to workout in the gym so you might only want one or two for those days when the weather makes it difficult to get to the gym. Other than that, there is a good chance that no matter how carefully you think and check out things, you'll end up with a workout you don't like.  When that happens, make a donation to the library or give them to used goods places like second hand stores or goodwill and other stores.  You can take a bit of a tax write-off that way.  Let me know what you think I'd love to hear.  Have a great day.

Friday, June 17, 2022

Exercising Outdoors In Extreme Heat Part 2.


Last time we looked at what could happen when exercising outside in really hot weather. as the heat can make exercising more problematic. Today, we'll look at things you can do to continue exercising outdoors.  

First step is to avoid exercising during the middle of the day.  Move your session to early in the day or later in the day but avoid the 11 am to 3 pm period when the temperature reaches it's highest point.  Keep an eye on the weather report for the temperature and amount of humidity since humidity can keep your body from cooling itself properly.

Next, always stay hydrated by drinking lots of fluid before, during, and after your workout session.  In fact, it is recommended that you consume 16 to 24 ounces of water about two hours before you begin your workout.  When exercising continue drinking fluid and keep sipping liquids as you cool off. Stick with water or a sports drink while ignoring soda, caffeine, or alcohol since they can dehydrate you further. Do not wait till you feel thirsty because by then it's too late. In addition, forget taking salt tablets because the addition of salt can make you more dehydrated.  You also do not want to drink real cold water because it can cause cramps.  

It is extremely important to use a broad spectrum sunscreen with an SPF of at least 30 when you are outside. Make sure you reapply the sunscreen every two hours or if you sweat because the sweat may cause your sunscreen to disappear and you don't want to get burned. 

When you get dressed to exercise outside, wear lightweight clothing that breathes. If you have clothing that includes some polyester, nylon, or lycra, the material will absorb any sweat making it easier for you to stay cooler. If you are going to be working outside, wear light colored fabrics that reflect the sunlight, leaving you a bit cooler.  In addition, wear a hat to protect your head and if you are beginning to feel hot or tired, wet the had down so you don't get overheated.

Know your limits in regard to your fitness level. If you are just starting out, you will react to being in the heat in a different way to someone in great physical condition who regularly workout in the heat. If at anytime, you feel tired, nauseous, or dizzy, immediately stop and take a break in a cooler location.  Make sure you give yourself time between each session so you can recharge your batteries and are in the best shape to exercise outside. Look at using a drink with electrolytes as you work out.   This type of drink replaces salts and minerals you lose during your exercise session. Look for a version that has less sugar for the best results.  

Finally, create a workout plan such as a short workout of speed walking in intervals, or choosing to walk up and down several hills.  If you are doing intervals, extend the periods of rest for better recovery.  As you work out more in the heat, you can extend your sessions.  The other thing to remember is to monitor yourself to make sure you avoid heat related illnesses.

If you are a walker, many places have malls that open well before the stores open so people can go there and get their exercise walking before the crowds.  If you do not want to exercise outdoors or have issues with the heat, look at the local mall.  When I lived in Texas, I did a lot of speed walking in the local mall so I wouldn't overheat.  Let me know what you think, I'd love to hear.  Have a great day.

Wednesday, June 15, 2022

Exercising Outdoors In Extreme Heat Part 1.

If you are reading the newspaper or following various news feeds, you know that many places in the United States are undergoing a heat wave right now.  I've seen where several locations are setting records and I'll guarantee that not everyone has access to air-conditioning or gyms to workout.  I do not have air-conditioning and I have to rely on open doors and windows at night to let cool air in and closing everything up in the morning. These tips can be applied even in regular hot weather.

Before discussing how to exercise in extreme heat, it is important to look at what happens to your body in heat and heat exhaustion versus heat stroke.  My mother overdid it one time and ended up with heat stroke.  After that point, she couldn't be a lot of heat again.

First of all, if you are not in good condition and are not used to working out in the heat, you have to be extremely careful.  As summer hits, the temperatures start to rise and heat related illnesses become more common because exercising in hotter weather puts additional stress on your body. Raised temperatures with increased humidity your body circulates more blood through your body to help cool it.  So there is less blood available for your muscles which increases the heart rate.  In addition, if the humidity is up, it is more difficult for sweat to evaporate off your skin and your body becomes more stressed. When you stop sweating when it's hot and humid, you face an increased chance of dehydration, heat cramps, heat exhaustion, or heat stroke.

Heat cramps are the mildest form of heat related illnesses.  Heat cramps are cramps and/or spasms that happen either during or after working out in hot weather and sweating.  As far as the other two, it is good to know the difference between heat exhaustion and heat stroke.  Heat exhaustion is a milder form of heat related illnesses that develops after several days of exposure to high temperatures, and not drinking enough fluids.  If heat exhaustion is not treated it could turn into a heat stroke. Heat stroke is the most severe heat related illness that is defined as having a body temperature of 103 or higher with in a period of 10 to 15 minutes.

Symptoms of heat exhaustion include dizziness, fainting, intense thirst, excessive sweating, a rapid weak pulse, nausea or vomiting, cold clammy skin, muscle cramps and fatigue while the symptoms of heat stroke include headache, confusion, elevated body temperature, no sweating, a rapid strong pulse, nausea, vomiting, red hot skin, and the person may lose consciousness. 

Heat cramps are easy to treat by immediately stopping your workout and moving to a cooler location.  Get rid of any extra clothing and grab a cool cloth for your skin or fan yourself to cool off. Drink a sports drink containing both sugar and salt and then stretch your muscles slowly. If you end up with heat exhaustion, you need to move to a cooler, preferably air conditioned place to lie down.  Take a cold shower or use cold compresses. Take off any tight fitting or extra clothing and drink lots of water or sports drinks. When you experience a heat stroke, call 9-1-1 immediately, move to a cooler place and apply cold compresses until the EMT's arrive. 

To avoid getting any heat related illnesses, take time to acclimate yourself to the warmer weather which takes between 7 and 14 days.  This is just starting with a 5 to 20 percent of the workout done in the heat with the rest of it in a cooler location.  Then each day, lengthen the time outside until you are used to it but if temperatures get too hot, you need to take some steps to keep from overheating.  On Friday, I'll be discussing how to exercise outdoors.  Let me know what you think, I'd love to hear.  Have a great day.


Monday, June 13, 2022

Matching Your Makeup To Your Outfit


Today you decided to wear a bright pink outfit with a black shirt but when you go to do your makeup, you suddenly realize you aren't sure what color or colors you should use on your eyelids.  You've decided you want to coordinate your makeup with your outfit so how do you go about it?  There are four rules you can follow so your makeup goes well with your outfit.

The first rule is to stick to one color palette when you decide to match your makeup to your outfit but you need to be careful as you try to coordinate your makeup with a bold outfit.  If you use a bold color on your face while wearing a bold shade, it could prove disastrous. When wearing a bold outfit, try a light hand for lipstick and mascara with a complementing shade of eye shadow.   Try to play down facial features when wearing a bold outfit.  If you wear outfits in the more neutral colors, you can wear bolder makeup.

The second rule is to distribute colors throughout the whole outfit.  Rather than trying to match your lipstick to your dress, try matching your lipstick to your accessories such as your shoes or your purse since your accessories are generally in a coordinated color.  The final result looks more polished when you match a small area of the outfit rather than the majority of it. If all else fails select a complementary color to go with the dress and accessories.

Third, do not go overboard trying to match everything because it is so easy to go overboard.  It's fine to match certain colors but try not to do a whole outfit and makeup in two colors.  Rather than going with your enthusiasm, take time to plan the outfit and the makeup you wear with it.  If you decide to wear bold eye makeup, pair it with a more neutral outfit but if you have bold clothing, remember to match your makeup to your accessories to keep from going overboard.

Finally know your makeup.  Remember that lipstick always makes a statement. If you wear bold colors, choose a pink or neutral lipstick but if you wear jeans and a shirt, you can choose a berry, red, or even orange to draw attention. In addition, keep in mind the various finishes so you end up with both the right color and finish to make the right statement.  

Next, never match your eyeshadow to your outfit however, you can choose a shade that goes well with the outfit.  If you wear a bold outfit, look at a gold, soft pink, or beige eyeshadow however you can choose a brighter eyeshadow as long as its a complementary color.  On the other hand, if you decide to wear something more low key with shade of grey or black, think about going with a smokey eye. 

Blush follows similar rules to eyeshadow in that blush should not match the outfit.  It is important to know which shades of blush go well with your complexion rather than trying to match your outfit.  So you know have tips to match your makeup when you wear a bold outfit.  On Wednesday, I'll be discussing working out in extremely hot weather because a part of the country is undergoing heatwaves where records are being broken.  Let me know what you think, I'd love to hear.  Have a great day.


Friday, June 10, 2022

The Top Colors Of Summer

Every season or so, fashion houses release new styles and new colors. This summer, there are six colors one should include to be on top of things.  Some of the colors are beautifully bright while others are more subdued.  The colors can be incorporated into the wardrobe you already have by wearing a scarf, buying a new blouse, or pants.  You don't have to buy everything new.

The first color to look at is yellow but not just any yellow. Although the use of a pale, buttery yellow is still being used, the bright sunshine yellows are gaining popularity but it's not a highlighter yellow.  If you add the bright yellow in via a scarf, or shoes, it will pop out, drawing people's attention.  On the other hand, if you prefer more attention, buy a suit or dress in the color. People often feel that yellow is a difficult color to wear but if you find a shade that goes with your skin tone, you'll look great.  If you have cool undertones, look at a daffodil, lemon, or super bright yellow but if you have warm undertones, look more at a goldenrod, buttercup, or honey shades.

Next, check out a pale purple such as lilac, periwinkle, or lavender.  Since it is a pale shade, it won't pop in the same way as brighter colors so look at using more of the color in a midi dress, large tote bag, or a long sleeved blouse or do a whole outfit from head to toe in a pale purple. 

The third color to check out is a bright lime shade that is close to a neon green. This is such a bright color, one should only wear it if you like standing out in a crowd.  Match the lime shade pieces of clothing with neutral shades so it doesn't overwhelm you or match it up with pastels and paler shades for a more subdued look.

Of course, the bright barbie pink is still a popular shade.  This popular color is one that flatters more people and is an easy shade to wear. This is a shade that could be worn as a maxi dress, a wide legged pair of trousers, or it can be used as a pop of color via a small handbag, or summer sandals. It is a color that makes people smile.

Next, look at a sunset orange. This shade enhances your summer glow without needing to use extra bronzer.  This orange is not horrible.  The best way to wear it is to pair it with white so you get more of a creamsicle look. In addition, this shade looks good with so many other shades, including the trending colors of summer.  Think about using it as a bit of color with the rest of the outfit to catch the eye.

Finally, there is Kelly green which is a bold color but a bit easier to wear than lime green. It is also a more flattering color for a wider range of skin tones than the lime.  Although it looks great paired with blues, purples, and pinks, it is best paired with the more neutral shades such as white, black, or beige.  To stand out wear a Kelly green maxi dress and coat.  

So if you are updating your wardrobe for summer, look at bright sunny yellow, pale purple, barbie pink, lime or Kelly green, and sunset orange.  Let me know what you think, I'd love to hear.  Have a great day.


Wednesday, June 8, 2022

Why Moisturize Your Neck


Most of us are great at moisturizing our faces or bodies but we often skip over our necks because it just seems to be in a weird location so we miss it. If we don't pay attention to our necks, they can become prematurely wrinkled and look old.

The cell composition of the neck is different from the rest of the body. Think about it, you do not get pimples on the neck but you get them on the face or body. It is thinner and more prone to wrinkling. When skin is thinner, it does not have as much collagen so the skin lacks the support to keep it from getting wrinkled.  The skin on your neck is about as thin as the skin on your eyelids. Due to the thinness of neck skin, it loses elasticity sooner than other parts of the body

In addition, your neck does not produce the natural oils the rest of your body produces. Your face produces oil which helps keep your skin moisturized and young but your neck has only a few sebaceous or oil glands so it produces only a little oil, not enough to protect the skin. When people have lots of sebaceous glands, they heal wounds better and experience fewer signs of aging. You also have a sheet of muscles that run from the jawline to the clavicle.  It is used by people on a regular basis and can be stretched out, causing people to look older. The skin on the neck is also being effected by gravity as it causes a pull on the skin.  Furthermore, the position we sleep in and how we hold our faces during the day can lead to aging.

As far as signs of aging, age spots and wrinkles will appear first on your neck and upper chest. Since we often forget to apply sunscreen the neck skin experiences damage from UV and environmental factors.  Your skin can become blotchy due to years of spraying perfume on your neck. 

One of the things you can do to prevent aging on your neck is to apply sunscreen to your neck every day.  Most people remember to use sunscreen on their face and body but forget to cover the neck.  It is also recommended that people exfoliate the skin on the neck using a product with glycolic or lactic acid. Apply any retinol product at night when it is most effective. 

People also forget to apply lotion to their necks as they apply lotion to their bodies.  It is easy to forget the neck. Although any type of moisturizing lotion can be used on the neck, it is strongly recommended one choose a lotion designed for the neck because they help stimulate collagen and elastin. It is important the moisturizer has vitamin C, niacinamide, hyaluronic acid, and vitamin A, the same important anti-aging ingredients found in face products.  If you want, you can use the same products on your neck that you use on your face if you want. When applying the cream or lotion to the neck, it should be applied using an upward and outward motions. It is important to include the back of the neck and ears when applying the moisturizer.  

So when you do your daily skin routine, don't forget your neck.  Extend the application of sunscreen down your neck so its protected and be sure to extend it down your chest to your neck line of your clothing.  Exfoliate, apply serums and moisturizers, finish with sunscreen during the day but at night include a retinol product.  Let me know what you think, I'd love to hear.  Have a great day.

Monday, June 6, 2022

Preventing Chapped Lips

For many people, they fight chapped lips only during the winter but for others, including myself, they seem to fight chapped lips year round.   Chapped lips are dry, cracked skin on your lips.  They are caused by dry or cold weather, exposure to the sun, dehydration, or licking your lips too much.

This happens because the skin on your lips are thinner and more sensitive than the rest of the skin on your body.  Your lips do not have any oil glands so your lips are at risk of becoming chapped.  Chapped lips is a medical condition called cheilitis.  In addition, if the chapped lips are caused by licking them, this is referred to as lip lickers dermatitis. Furthermore, chapped lips can occur seasonally or all year round. Sometimes, one gets chapped lips due to certain medicines.

Chapped lips are diagnosed visually by seeing dry or cracked lips, peeling skin, itching skin, or sores around the mouth.  There are ways to prevent chapped lips by doing a few easy things.  First, protect your lips before you go out.  Apply a lip balm or cream that contains sun screen since you need to protect your skin from the sun. Your lips tend to be exposed to sun so wear a scarf that adds a layer of protection.  Don't forget to reapply the creme or balm regularly on your lips. 

Refrain from licking your lips.  Although the moisture seems to make it feel better, it evaporates quickly, leaving your lips dryer than before. If you find yourself licking your lips due to the flavored lip balm, switch to a plain unflavored version so you don't lick your lips.  

Make sure you are hydrated by drinking lots of liquid throughout the day and when you are home, run your humidifier so there is sufficient moisture in the air. In addition, try to avoid irritants and allergens like fragrances, or dyes and breathe through your nose.  When you breath through your mouth, you cause your lips to dry out.

To treat and keep from getting chapped lips, many of us reach for certain products such as lip balms designed to repair and prevent them.  First of all, it is recommended one reach for a healing ointment rather than a lip balm but for many, it is easier to find a lip balm or chap stick. When buying a healing ointment or balm, look for one that is  fragrance free, hypoallergenic, have oils such as caster seed oil, shea butter, ceramides, dimethacone, titanium oxide or other sunscreen.  Avoid balms that contain camphor or eucalyptus, menthol, flavoring such as peppermint, cinnamon, certain waxes, or salicylic acid.

Lip balms actually seal the cracks in your lips while hydrating at the same time.  Lip balm should be applied as needed throughout the day. Make sure to reapply it after you eat or drink and apply it just before bed to protect your lips overnight and allow the lips to hydrate.  If you are outdoors, make sure you reapply the balm at least once every two hours so the sun screen protects your lips.

If your lips begin bleeding, use a lip creme designed to heal chapped lips but if the lips do not improve after a week or two, see your doctor for additional help.  It is possible to use lip gloss if you don't have anything else but it is still recommended one use a healing ointment or lip balm over the gloss.  Let me know what you think, I'd love to hear.  Have a great day.


Friday, June 3, 2022

The Skin Cycle

Many people know that cells are created, last a while, die before falling off the skin but do you know how long it takes from birth to death?  Your skin goes through a regular cycle over a certain period of time.

Let's start with the makeup of your skin.  The inner most layer is the hypodermis which is where the cells are created.  It is made up of nerves, large blood vessels, connective and fatty tissues. It's the layer that helps regulate your body temperature. Over time, the fatty layer decreases causing your skin to sag.

The middle layer is the dermis or corium. This layer has the blood vessels that carry oxygen and nutrients through your body while removing waste products. There is a lot of collagen in this layer and when the amount of collagen decreases, your skin develops wrinkles. Your skin loses its elasticity as you age and this layer has a lot of elastic fibers.  The amount of collagen in your skin is responsible for how many fine lines and wrinkles appear in your skin.  The more collagen in the dermis, the younger your skin looks. 

The top layer is the epidermis.  It is the thinnest layer designed to protect your other layers of skin. This layer is composed of four different layers with several different types of cells. This is the layer that sheds the older dead skin cells and the process slows down as you age and your ability to repair cuts also slows down at the same time. 

In reality, new skin cells are formed at the inner most or deepest level of the epidermis and then works it way up to the top layer before flaking off.  As far as how long it takes, it varies on age, skin condition, hormones, health, and stress.   When you are young, around 20, the cycle can take between 14 and 21 days, while those classified as middle aged have a cycle that takes around 28 days but takes 45 to 60 days when people hit their 40's and 50's and it takes 60 to 90 days when people reach their 60's and 70's.  So it is said the skin cycle averages between 5 and 6 weeks. 

The length of the skin cycle is important because as we age, it gets longer and this means dead skin cells are accumulating on the outer layer. This causes sagging, fine lines, and wrinkles. In addition, bacteria can be trapped in the layer of dead cells, causing blackheads and acne.  Many of the dead cells are irregularly shaped or discolored and when these are in the top layer, discoloration and spots appear. 

Thus it is important to choose skin care products that encourage faster cell turnover while encouraging new cell production. So when you decide to try a new product, you need to give it a full 28 days to determine if it works because it is important to give your skin a chance to go through most or all of a skin cycle.  It really takes that long.  You can't decide if a product is working in less than that time and if you are a bit older, give it more time before you decide it isn't working.

So now you know more about the cycle of your skin and how long you need to try a product.  Let me know what you think, I'd love to hear.  Have a great day.

Wednesday, June 1, 2022

Different Eyeliner Looks

I'm still doing the nice thin line on the upper eyelid with a thin line on the outer half of the lower lid but I know there are so many different ways to apply it to achieve a variety of looks.  I usually do this particular look because it's fast, easy, and any mistakes don't show as much.  So I need to practice other looks so it becomes as easy to apply as what I use now. I apologize for my drawings ahead of time.  I'm not real good.

We all know about the cat eye where you start on the inner eye and draw it outward increasing the thickness of the line as its applied to the edge and then it continues up and out to form a wing so it ends in line with the end of the eye brow.  It is best accomplished with a liquid eyeliner.


A look similar to the cat eye is the arrow which starts the same as the cat eye but another thick line goes up along the fold becoming narrower and fading out to mid eyeful.  It's like two lines coming to a point at the edge but they are different lengths.  I have a drawing to the left. 


Next is the fishtail liner with a thick line on the top lid and a semi thick line on the bottom lid going from inner to outer corners but the lines extend past the outer edge of the eye without meeting.  There is only a small flare at the end of the top line at the outer edge. A gel or liquid eyeliner is best for this.

Of course one can always stay with the natural line which is a line on the upper eyelid only. This is best done with a pencil eyeliner because you want it to smudge along the upper edge of the line to give it depth. The line itself isn't too thick but it smudges upwards from the line so it looks as if you have some matching eye powder.


The thick winged liner is a thick line on the upper lid which starts thick at the inner corner and ends up going to a nice wing outside the outer corner.  It is thick the whole way from edge to edge. It has a shape that follows the curve of your eyelid.

The standard winged liner is where you have a thicker line on the top eyelid and a thinner line on the bottom meeting at a wing at the outer corner.  To make a bold statement, use the thick all-round winged liner which adds a thick liner to the lower lid and meets at both the inner and outer corners so it looks continuous and appears thick even in the inner corner.

You can also reverse the winged look by having the thinner line on the top lid and the thicker line on the bottom with the wing on the bottom part at the outer edge. This is as if they took the normal winged look and just flipped. 

On the other hand, if ou want something unique, try a thick blue upper liner from inner to outer corner ending at a beautiful wing on the outer corner.  Then do a thick line on the lower eye in say a beautiful sparkly green that meets the wing on the bottom lid of the eye so you have two different colors above and below your eye.

Want something to give a bit of an illusion?  Apply your eyeliner along the top lid of the eye so it isn't thick but comes to a wing on the outer corner.  Then apply a line above the crease so it follows the natural curve but isn't too thick.  This makes it look as if you have a floating line.

Don't want too thick a line but want to make a statement.  Apply your eyeliner as usual but give it a long, long tail that is medium in width so it's seen but not overpowering.  

Last look, is what I call the vamp look but others refer to it as smoky liner.  The black eyeliner flows out from inner corner around the eye.  The upper line is thick and covers the lid while the bottom line is thick and the two lines meet at the outer corner, so the colored area encircles the eye.  Then the edge is rounded at the edge and it's smudged into the area above the crease but not all the way up to the eye brow.

Just a few ideas for changing your eyeliner so you can change your look depending on your look and how you feel.  Let me know what you think, I'd love to hear.  Have a great day.